Working with the Layers panel

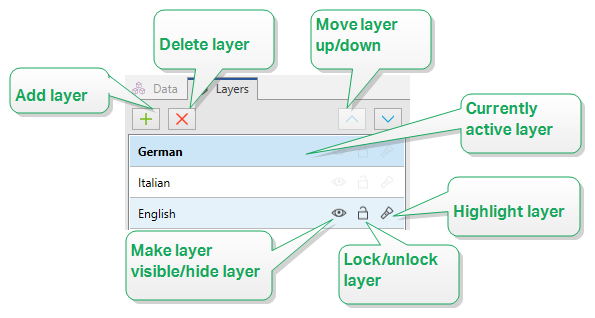
Adding a layer: Click the green plus button to add a new layer. This adds a new layer on top of the default layer. The number of layers is not limited.
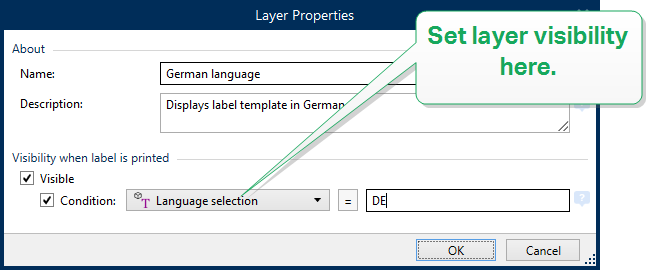
Setting the layer properties: The Layer Properties window appears automatically when you add a layer. Use this window to set the properties of the added layer:
Add Name and Description to make your layers easy to find and edit later when you add more layers.
The Visibility settings allow you to define if objects on layers are visible when you print the label
, or after you run the form .Note
In comparison with layer states (see section For easier designing: layer states), the visibility settings affect the layout when you print a label
, or when you run a form .Visible: defines if the objects on the selected layer appear on the printed label
, or are visible when you run the form .Condition: the layer is visible if the result of the given condition is "True".
Example
You can create a single label template for labels in multiple languages. Stack the objects with text in the required languages on the dedicated layers. Use visibility conditions to only display the layer with the right language – in this case German.

Deleting layers: Select a layer and click the red X button. This deletes the layer with all of its objects. If the layer is locked, you cannot delete it.
Moving layers up or down: You can change the stacking order for your existing layers. This allows you to define how the objects overlap. If you move one layer above another, you also place the objects on this layer in front of the objects that belong to the layer below.