Adding printers

Add your printers to Control Center before you install them on your computers. You can manually add TCP/IP printers, or automatically find printers in your system and choose which printers to add.
Adding printers manually (TCP/IP)
TCP/IP printers provide a raw TCP port for your printing data. Most printer manufacturers use port 9100.
Note
We recommend using advanced port monitor and TCP/IP(RAW) printing protocol when supported by your printer.
Go to
Control Center >Printers >Printers and clickAdd .From the dropdown menu, choose
Manually add TCP/IP printer . TheManually add TCP/IP printer window opens.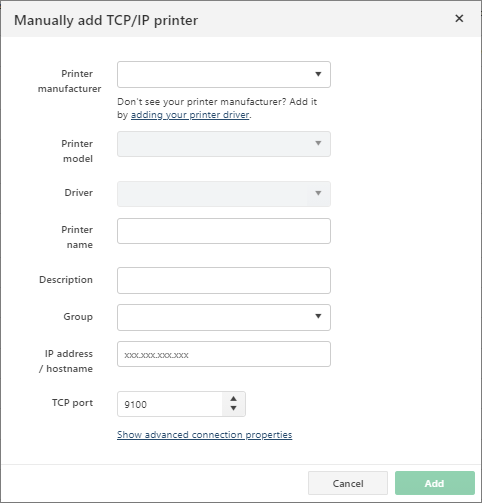
Type your printer information and click
Add .(Optional) To add LPR printers:
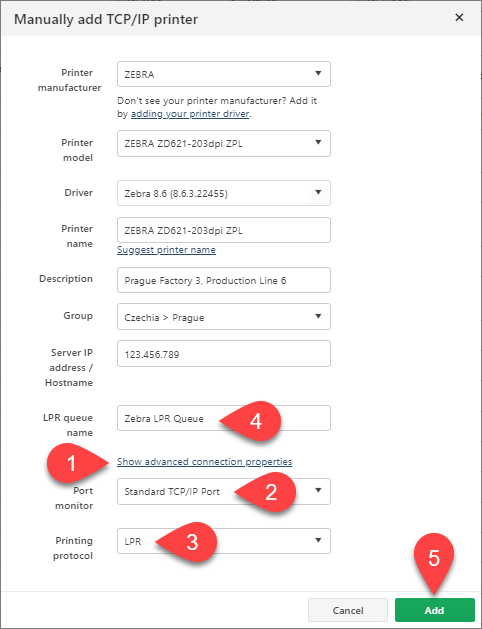
Click
Show advanced connection properties .For
Port Monitor , chooseStandard TCP/IP Port .For
Printing protocol , chooseLPR . TheLPR queue name field appears.Type in your
LPR queue name .Click
Add .
Your new TCP/IP printer appears in your list of centrally managed printers. Now you can install your added printer on your computers.
Adding printers automatically with Import Printers
Find existing printers connected to computers in your system to add to Control Center.
Go to
Control Center >Printers >Printers and clickAdd .From the dropdown menu, choose
Search for printers in my environment . TheImport Printers window opens.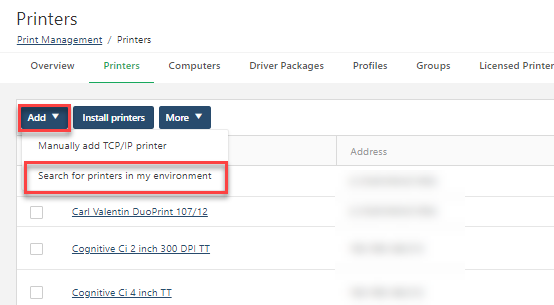
In
Select Printers , from the dropdown menu, choose your computer to see printers from that computer. UseFilters (on your right) to narrow your selection and find printers to add.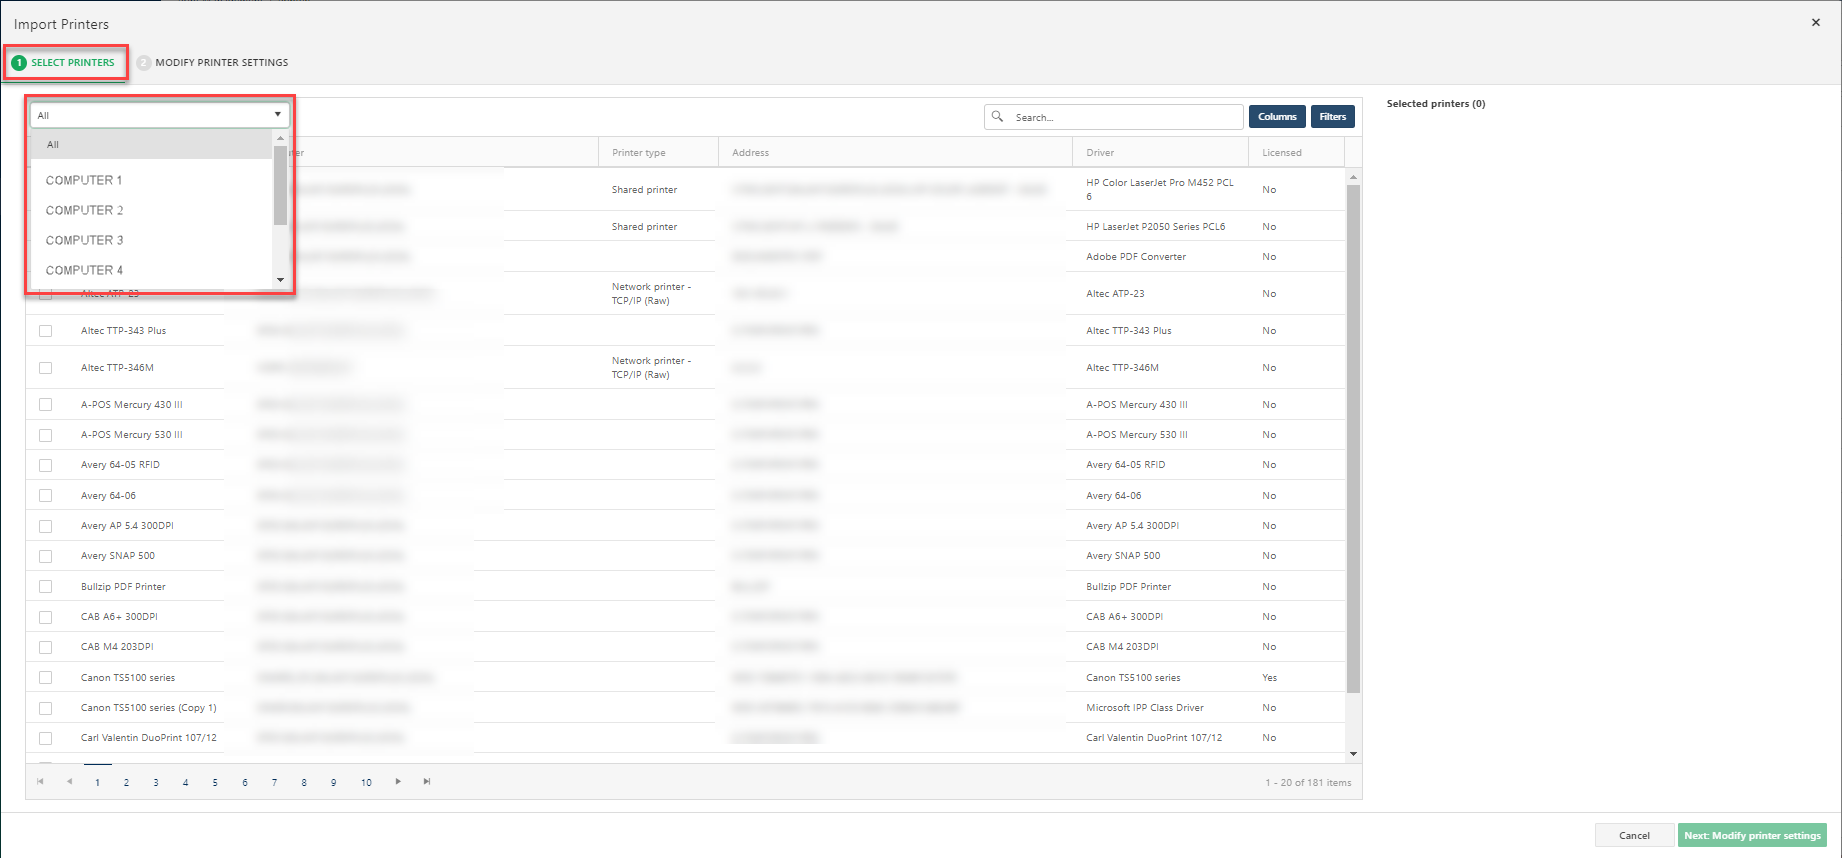
Select printer(s) to add, and click
Next .In
Modify Printer Settings , select your printers to apply settings: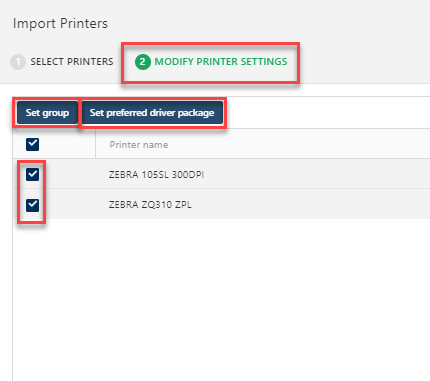
Click
Set group to add your printers to an existing printer group from the drop-down menu.Read more about printer groups: Groups.
Click
Set preferred driver package to connect your printers with an uploaded driver package from the drop-down menu. Setting a preferred driver package to use this driver package to control printing preferences and future installations on other computers.If your preferred Loftware drivers are version or newer, you can update printing preferences directly in Control Center. If you choose to use older preferred driver versions, you may not be able to change your printing preferences directly in Control Center without DEVMODE.
Read more about drivers: Driver Packages.
Note
Your selected printers must be from the same manufacturer to set shared drivers. You can't connect printer drivers with printers from different manufacturers.
Click
Finish to add your printers.
Importing printers from Excel
You can enter a list of your printers in a predefined Excel template and then import the Excel file in Control Center. This way you simplify entering each printer's data individually.
You can also use the Excel table if you don't have user rights to install printers in Control Center. You can send the Excel file to the Control Center administrator who can import the Excel file and install printers.
Your Excel file contains the following printer data:
Printer name
IP address
Port number
Port monitor type
Group
Manufacturer
Printer model
Driver package
To generate the Excel file and import printer data:
Go to
Control Center >Printers >Printers and clickAdd .- From the drop-down menu, choose
Import from Excel . TheExcel Import window opens.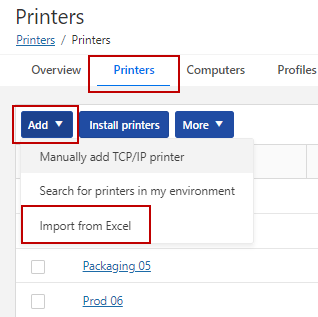
Click the
Download button. The Excel templatePrinters-import.xlsxsaves to your local disc. The Excel file already contains data about your existing driver packages, groups, and port monitors.Open the downloaded
Printers-import.xlsxand go toPrinterssheet. Enter your printers' data into green columns (Printer name, Description,...). Copy the values from other sheets in blue columns (Port Monitor, Group,...)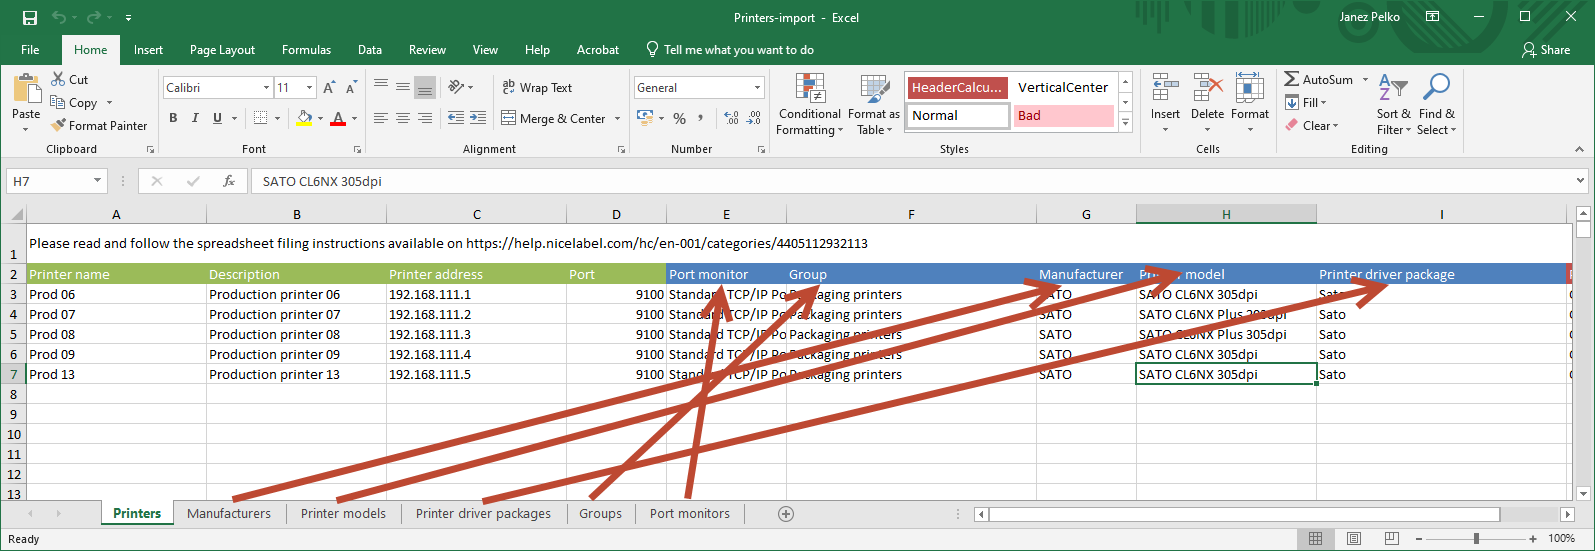
Warning
Printers-import.xlsxcompares the data in thePrinterssheet (blue columns) to data in other sheets. If data don't match, thePackage checkcolumn shows an error.You can't insert driver packages data that is not stored in Control Center.
Warning
If you later add additional printers with Excel, create a new Excel file with only new printer data. Control Center will not import an Excel file with the existing printers.
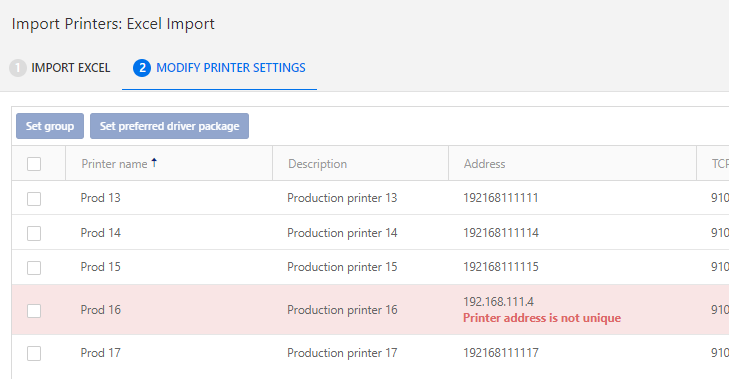
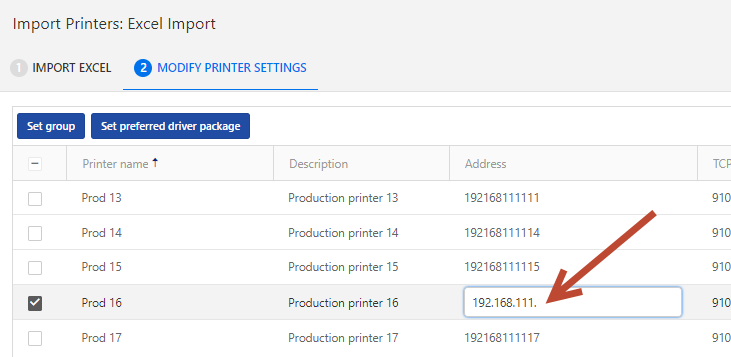
Upload your Excel file to Control Center and click
Next: Modify Printer Settings .In this step, you can change groups or preferred driver packages for selected printers. You can also change these properties later in Control Center.
Tip
If you get errors, you can modify your data by clicking to the field where error occurs. You cannot delete the whole printer record.
Click
Finish to add your printers.
Your installed printers are imported and appear in your list of printers. Now you can manage printing preferences for your printer or install your printers on other computers.