Create a Script To Define a Printing Field Property
Description
Create a field level script that prints (or does not print) a field based on the value of a key field. This is useful if you need to create a label with conditional fields or images that are dependent on the value of other fields on the label.
The effect of this type of script is to turn on or off the printing attribute of a field on the label.
Solution
Use the Example Label
This example uses the FieldLevelScript.lwl file attached to this article.
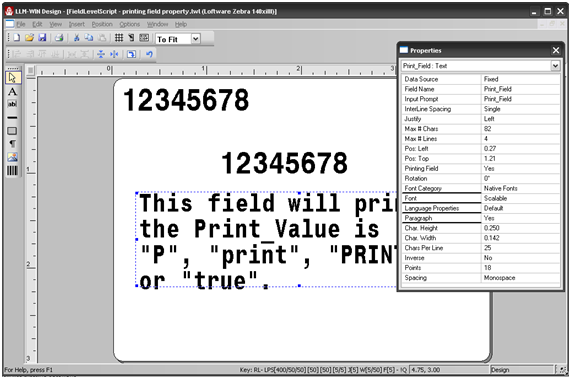
There are three fields on the label:
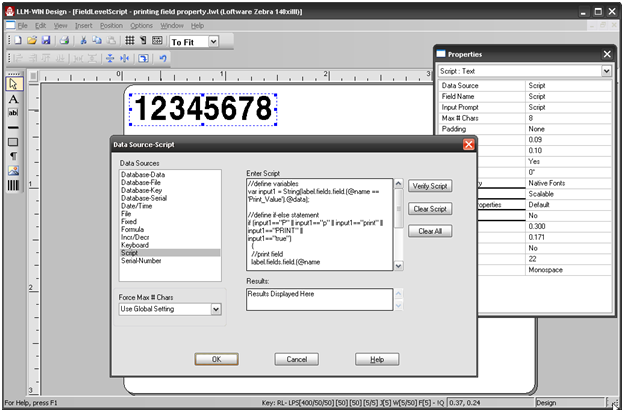
- A script field that uses the Script Data Source
 Where data is extracted to produce labels. Loftware Label Manager provides a variety of data sources, including the keyboard, a database, serial number, a formula, via the UCC or UPN Wizard. For RFID labels and tags, data can come from the Keyboard data source or by configuring data blocks using the Block Configuration data source., and contains the following example script.
 - The Variable field Print_Value, where we will enter the variable data that the script is going to run the logic against.
- And the Print_Field which, depending on the value entered will either print or not print.
<pre class="syntaxhighlighter-pre" xml:space="preserve">//define variables
var input1 = String(label.fields.field.(@name == 'Print_Value').@data);

//define if-else statement
if (input1=="P" || input1=="p" || input1=="print" || input1=="PRINT" || input1=="true")
{
   //print field
   label.fields.field.(@name =='Print_Field').@printingField = true;
}
else
{
   //don't print field
   label.fields.field.(@name =='Print_Field').@printingField = false;
} </pre>- Save the example label to the Loftware Labeling/Labels folder or to your custom Labels folder.
- Open the label with Design32.
- Using On-Demand Print or File Drop The action of making print requests by placing files in the LPS scan directory. LPS detects this request and responds by printing the label. See Scan Directory., pass p, P, Print, PRINT or true to the Print_Value field. The Print_Field text should appear on the label.
- Print again, but pass a "false" value to Print_Value. The text will not appear, as the Print_Field has become a non-printing field.
Create a Label with a Field Level Script
- Create a new label, and add the following fields:
- A scripting field
- An input field
- A field that will print or not print
- Modify the example script using the names of the fields on your label.
- Copy the modified script into the scripting field data source window (Loftware recommends creating scripts in a text editor such as Notepad and copying into the Data Source window).
Article Number
2011008
Versions
Loftware Label![]() A label is a design area on the computer screen where a label format is created or edited. Manager / Loftware Print Server versions 9.5.2.0 - 11.1
A label is a design area on the computer screen where a label format is created or edited. Manager / Loftware Print Server versions 9.5.2.0 - 11.1
Environment
All supported installation environments.