Connector for SAP: BC-XOM Configuration Checklist
Problem
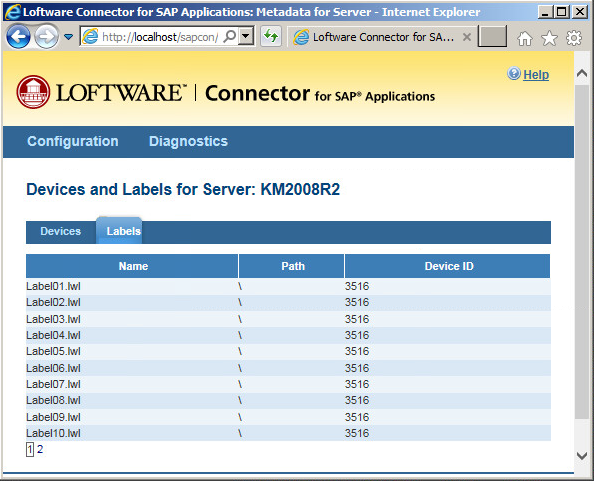
Connection or Printing issues related to the Connector![]() See Loftware Connector. for SAP Applications using BC-XOM communication.
See Loftware Connector. for SAP Applications using BC-XOM communication.
Explanation
This article outlines how to verify the necessary information required to configure the Connector for SAP to receive requests via BC-XOM. This is more of a list of data points than a tutorial but should be helpful when validating a customer environment. This does not cover the configuration of the CLI as access to the SAP server is required and should be handled by the SAP Basis team.
General Case
This information is for the general case and may not cover every deployment.
Solution
- Open SAP interface.
- Access Spooler Admin (SPAD).
- Enable Extended admin, or Full admin.
- Access Output management systems tab.
- Click on Display for Logical Output Management Systems (LOMS).
- Double click on the OMS Name.
- Verify the Target for callback value.
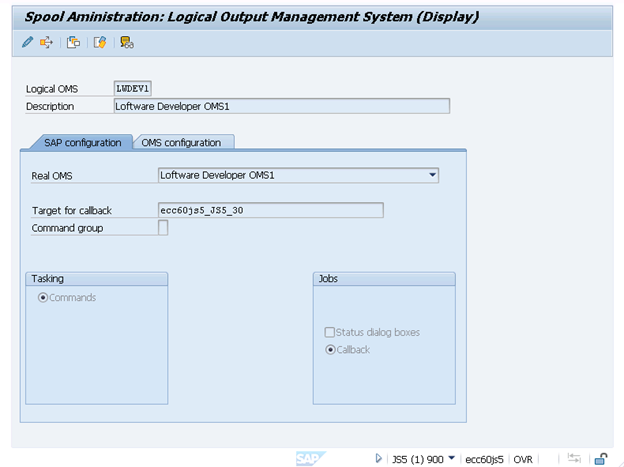
- Go Back (F3) twice and click Display for Real Output Management Systems.
- Note the Real OMS Name (ROMS).
- Access the Loftware Connector
 Java-based software that establishes a high-speed connectivity bridge between UNIX-based enterprise applications and the Loftware Print Server (LPS). UI System Configuration.
 - Make sure that the SAP call back matches the LOMS Target for callback.
- Make sure that the ROMS matches the ROMS Name.
- Configuring the sapwrfc.ini file
- DEST= any value as long as it matches the related entry in the NLINK Configuration.xml file.
- TYPE= A for Single instance BCXOM configuration / B for R/3 Load Balancing.
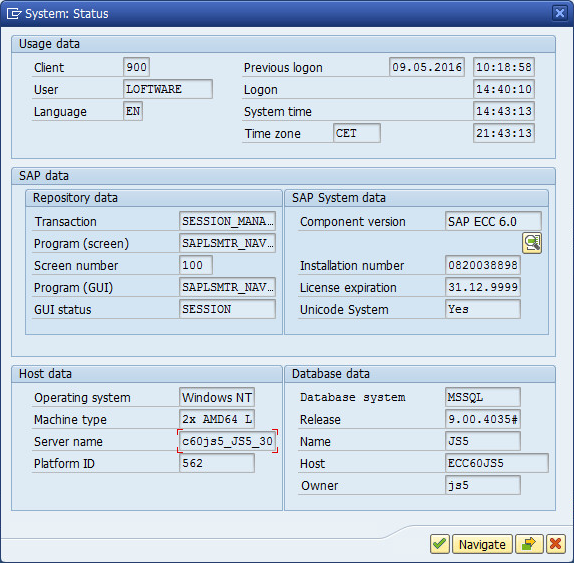
- ASHOST= the SAP Connector Server Name (ecc60js5) from SAP Logon 740 interface System menu, Status, Host field.
- SYSNR= System number (30) from SAP Logon 740 interface System menu, Status, “Server name” (ecc60js5_js5_30).
- Configuring the NLINK Configuration.xml
- XmiCallback[X]Destination= must match a DEST value in the sapwrfc.ini file.
- XmiCallback[X]Client= Client number used when signing in to SAP (i.e. 900).
- XmiCallback[X]UserID= User Configured in SAP so the connector can log in to update job status.
- XmiCallback[X]Password= Encrypted password for the UserID above. Use NLINKPassword.exe to encrypt the password.
Load Balancing
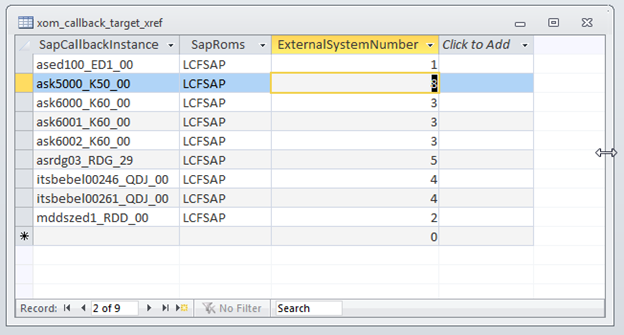
While there is a bug in the UI that prevents the entry of duplicate External System Numbers (ESN), the Provda Database does not have a unique constraint on that column. Load balanced systems should use the same ESN for all callback System Configurations.
Access the Provda database using Microsoft Access and modify the xom_callback_target_xref so that the load balanced systems use a single ESN. Modify the NLink Configuration.xml file removing duplicate entries, making sure that there are no empty entries in the middle of the list and then adjust the ESN values to match.
Article Number
2017004
Versions
All supported versions of the Loftware Connector for SAP Applications
Environment
Any supported environment for the Loftware Connector for SAP Applications