Zebra Printer not Picking up Change in Stock Size
Problem
Stock size change is not being applied to the target Zebra printer. After modifying the stock size, the printer is still printing the label as if the stock was the former size.
Explanation
A stock size change is not being recognized by the printer. When the new label is printed, only part of the label is printed. For example: a Zebra printer was used to print 4 x 6 labels and a change was made for a new label that uses 4 x 10 stock. The next label output only prints 6 inches of the label and not the full 10 inches.
Potential Causes
- The printer needs to be calibrated for the new Stock size.
- The stock settings in Loftware is incorrect.
- The settings within the Printer configuration are incorrect.
- The internal stock size calibration for non continuous stock is not being reset.
Solution
Resolve the issue by using the following recommended procedures:
The printer needs to be calibrated for the new Stock size
- Calibrate the printer according to the manual calibration sets outlined in the Printer's Users Guide
The stock settings in Loftware is incorrect
- Open the Label
 A label is a design area on the computer screen where a label format is created or edited. in design and press F5 (Label Setup and Properties) verify the label size.
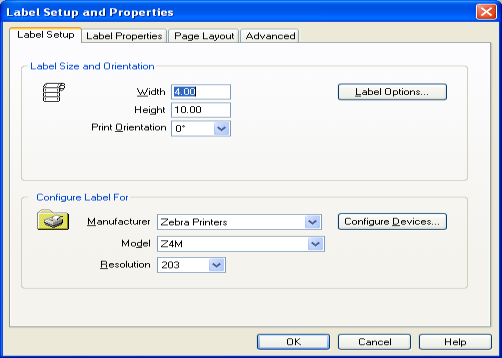
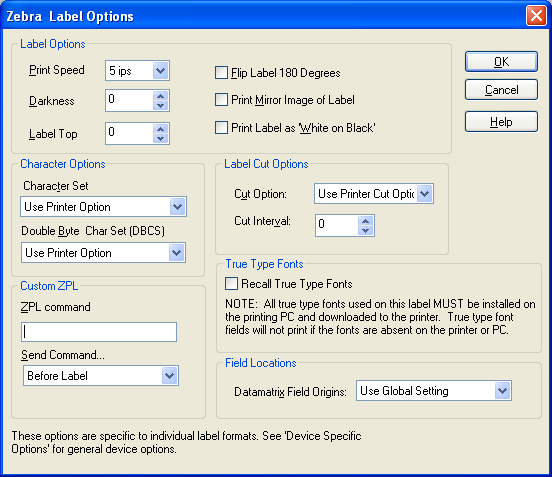
- Select the Label options and verify the Label Top setting is correct.
The settings within the Printer configuration are incorrect
- Review the Printer's User Guide for information on menu setting within the printer.
- Check setting for Label Length and Stock type.
The internal stock size calibration for non continuous stock is not being reset
- If the issue is still present after completing the steps outlined above it is possible that the internal sensor setting for the stock size is not correct or is not being reset.
- If the issue has reached this point, it is suggested that Zebra be contacted for assistance.
- It is possible to set the sensor length using a custom command in a label to reset the sensor.
-
- First multiply the Label length by the printers DPI to determine the length of the label needed. For example if the printer has a 203 DPI print head and the label length is 10 inches, 10x 203= 2030. To be sure the size is correct add a little to the figure, for this example 2050.
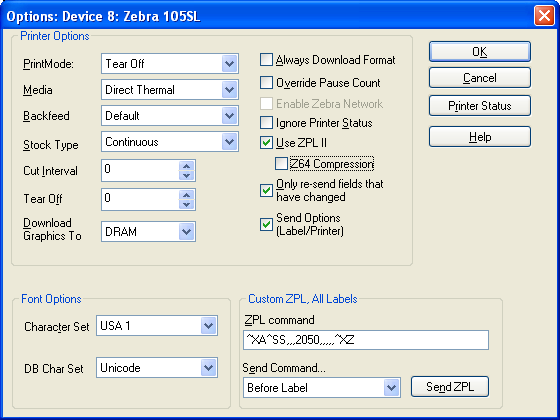
- Using this information add this custom command to the label: ^XA^SS,,,2050,,,,,^XZ (See the example shown below).
- The Send Command should be set to 'Before Label'.
- Note that the "," characters are critical as this command would use other settings in those place holders. In this instance, those optional settings are not used, but the placeholders are required for the printer to properly process this specific command.
- Send a test label with the command to the label and verify that the label is printed correctly then print the customer label to the printer to verify that the issue has been resolved. The setting can also be sent to the printer using the Printer Options.
Article Number
2016041
Versions
All supported LPS family product versions
Environment
Zebra Printers