Network Port Installation Steps
After selecting the network port, install one of the printers that are discovered on the network, or install the printer manually.
Network port installation using network discovery
Select the detected network printer and click
Add .
Note
Network ports that are in use are listed at the bottom of the list and grayed out.
Note
For printers that identify themselves by their series (and not by the exact model), select from the listed series of printers. This series may include multiple printer models. The selection directs you to the Printer Options.
If specific models of the detected printer's vendor are listed, select the appropriate one and click
Next .
Wizard redirects you to the Printer Options step.
Follow the wizard to install your printer driver.
Note
Network discovery is available if the printer model supports bidirectional communication.
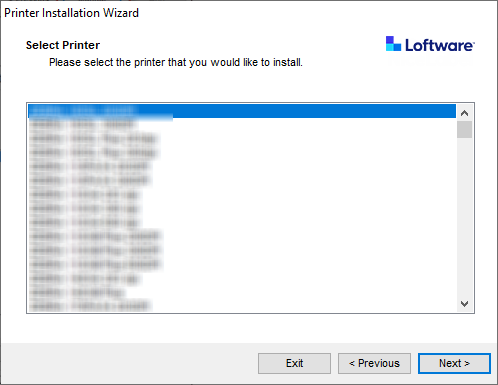
Manual Network port installation
To start the manual network port printer driver installation, click
Manual .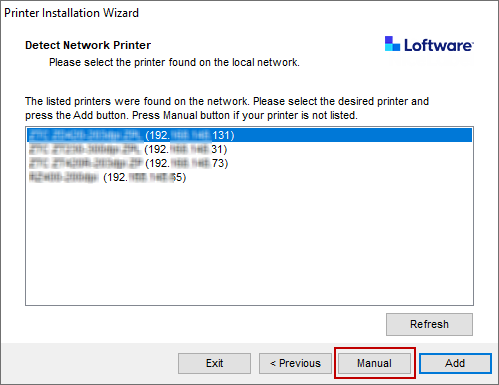
Select your printer model.
In
Select Network Port window select which network port your printer will connect to.Create a new network port option opens theAdd Network Port window.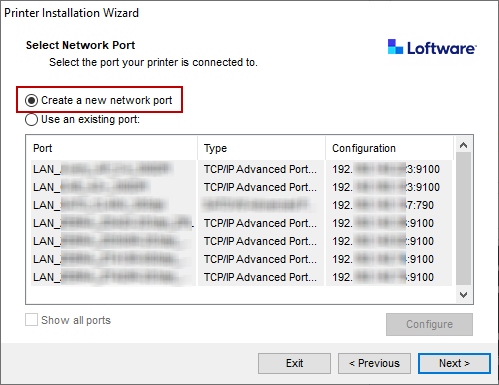
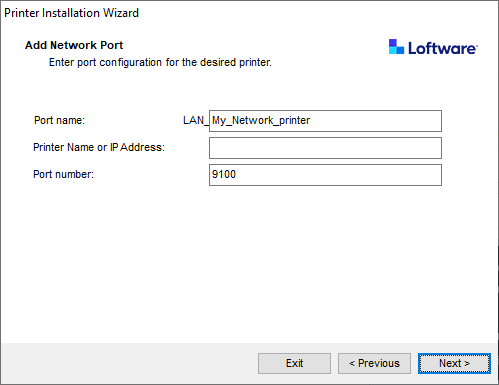
Port Name : defines the name for the newly created network port.Important
Use the "LAN_" prefix in the
Port Name to signal the printer driver that this is a bidirectional enabled port. Without the "LAN_" prefix, bidirectional communication stops and disables printer status checking.Example
LAN_MyPrinter_300 dpi
Printer Name or IP Address : defines which printer connects to the newly created network port.Port Number : number of the newly created network port. PrnInst suggests the number automatically.
Use an existing port : selects an automatically detected network port to connect the printer.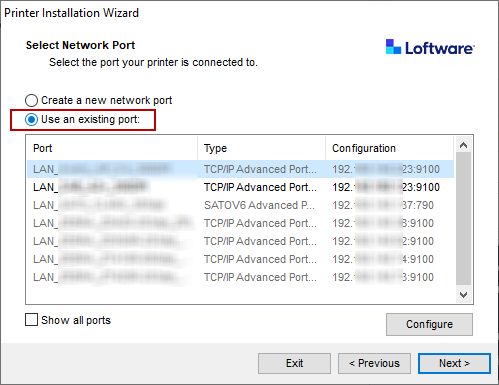
Enable
Show all ports option to list all available (also non-network) ports.Click
Next to proceed to Printer Options step.