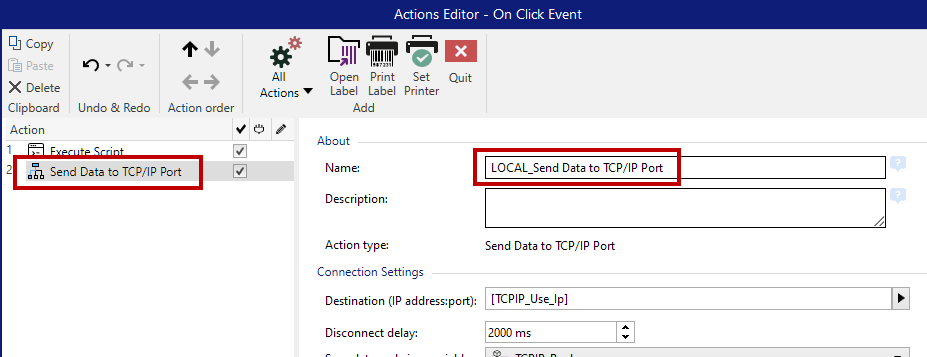
Send Data to TCP/IP Port
This action sends data to any external device which accepts TCP/IP connection on a predefined port number.
Send Data to TCP/IP Port establishes connection with a device, sends the data and terminates the connection. The connection and communication is governed by the client – server handshake that occurs when initiating or terminating the TCP connection.
Important
If you connect to your local SQL database with Web Client, start the Execute SQL Statement action name with the "LOCAL_" prefix.

About group identifies the selected action.
- Name: allows you to define a custom action name. This makes actions easily recognizable on the solution's list of actions. By default, the action name is taken from its type.
- Description: custom information about the action. Enter a description to explain the purpose and role of action in a solution.
- Action type: read-only information about the selected action type.
Connection Settings group sets connection details.
Reply to sender: Enables direct reply to the socket from which the trigger data originates. Use this option to provide feedback about the printing process.
Note
This option is available in Loftware Automation.
Prerequisites for Reply to sender setting are:
Remote party does not close the communication channel, once the message gets delivered.
Send Data to TCP/IP Port action is used within the TCP/IP Server trigger.
Do not configure the Execution Event in the TCP/IP Server trigger as On client disconnect.
Destination (IP address:port): destination address and port of the TCP/IP server. Hard-code the connection parameters and use fixed host name or IP address or use variable connection parameters by clicking the right arrow and selecting a predefined variable. For more information, see section Combining Values in an Object in Loftware Automation user guide.
Example
If the variable
hostnameprovides the TCP/IP server name and the variable port provides the port number, enter the following parameter for the destination:[hostname]:[port]Disconnect delay: prolongs the connection with the target socket for the defined time intervals after the data has been delivered. Certain devices require more time to process the data. Insert the delay value manually or click the arrows to increase or decrease it.
Save data reply in a variable: selects or creates a variable that stores the server reply. Any data received from the TCP/IP server after passing the "disconnect delay" is stored in this variable.
Note
If you use

Content group defines the content to be sent to a TCP/IP server.
Tip
Use fixed content, mix of fixed and variable content, or variable content alone. To enter variable content, click the button with arrow to the right of data area and insert a variable from the list. For more information, see section Combining Values in an Object in Loftware Automation user guide.
Data: content to be sent outbound.
Encoding: encoding type for the sent data. Auto defines the encoding automatically. If needed, select the preferred encoding type from the drop-down list.
Action Execution and Error Handling
Each action can be set as a conditional action. Conditional actions only run when the defined conditions allow them to be run. To define these conditions, click Show execution and error handling options.
Execution options are:
- Enabled: specifies if the action is enabled or disabled. Only enabled actions will execute. This functionality may be used while testing a form.
- Condition: defines one-line programming expression that must provide a Boolean value (true or false). When the result of the expression is true, the action will execute. Condition offers a way to avoid executing actions every time.
Error handling options are:
- Ignore failure: specifies whether an error should be ignored. If enabled, the execution of actions continues even if the current action fails.
Note
Nested actions that depend on the current action do not execute in case of a failure. The execution of actions continues with the next action on the same level as the current action. The error is logged but does not break the execution of the action.
- Save error to variable: allows you to select or create a variable to save the error to. The same cause of the error is also saved to internal variables ActionLastErrorId and ActionLastErrorDesc.
At the end of printing, you might want to send the status update to an external application using the HTTP Request action. If the printing action fails, action processing stops. In order to execute the reporting even after the failed print action, the Print Label action must have the option Ignore failure enabled.