Adding HTTPS site binding and SSL certificate in IIS
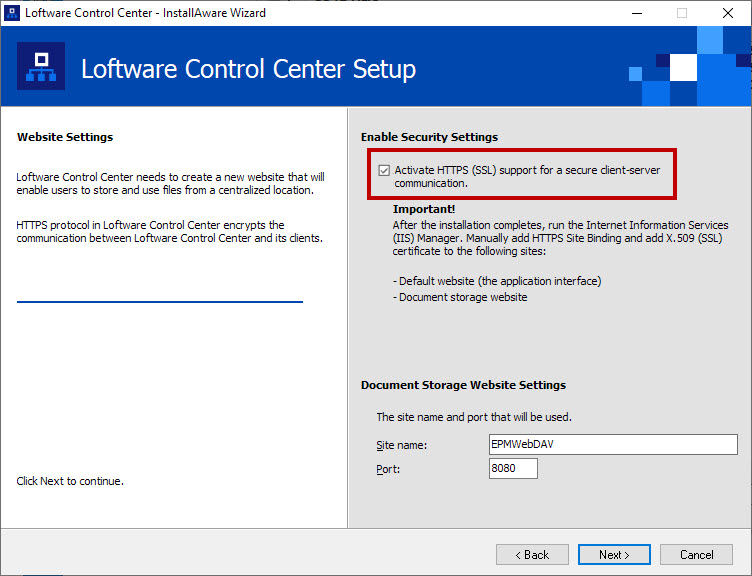
When you are planning to use your Control Center in an open networking environment, select HTTPS support while installing your Control Center for secure client-server communication. If you enable the HTTPS support option during the installation, your Control Center's address becomes https://yourservername/epm (http:// becomes https://).
Tip
For more information about the security of your printing environment, consult your co-workers responsible for the networking infrastructure in your company.
Before you can open and start working with your Control Center using a secure connection, configure your IIS.
Note
If you do not have the IIS Manager installed onthe server where Control Center is installed, get it from the Microsoft Download Center.
Instructions for the Default Web Site
Open your IIS Manager.
In the Connection panel on the left side of the window, expand the "yourservername" node, and expand the Sites node.
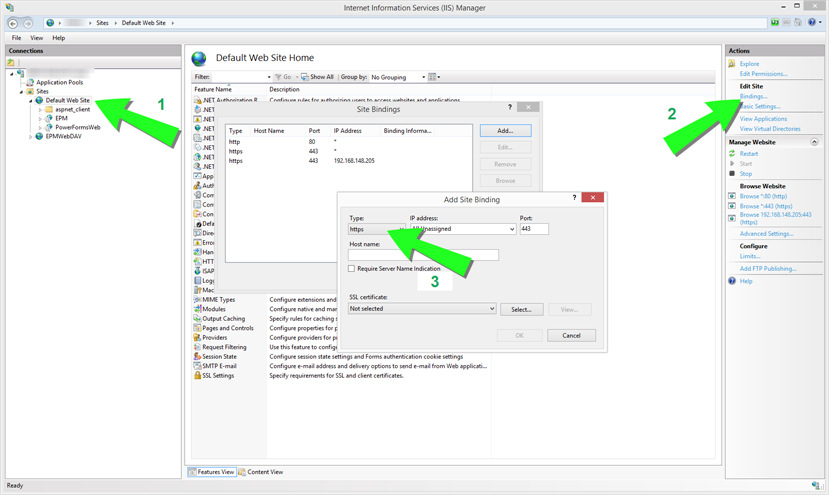
Select Default Web Site.
In the Actions panel on the right side of the window, click Bindings.
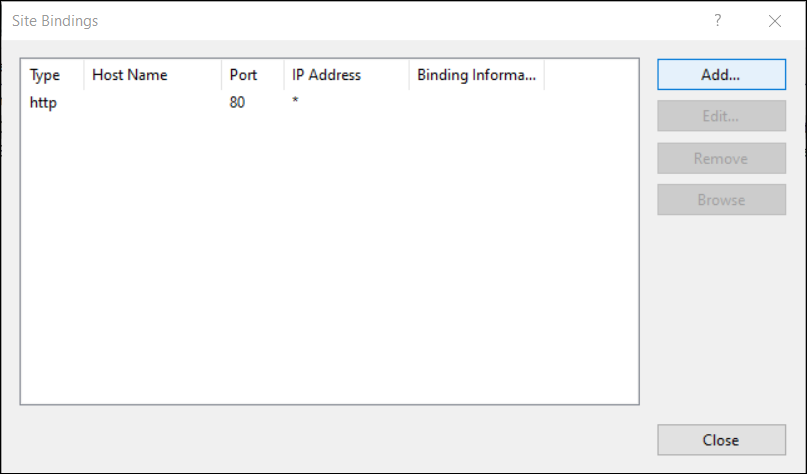
Site Bindings dialog opens. Click Add.
In the Type field, select https.
In the Port field, enter 443.
In SSL certificate, select your certificate from the list. Click View to see the properties of your certificate.
Note
If you do not see the appropriate certificate on your list, install your certificate first. There are numerous instructions on how to install the certificate available on the Web.
Click OK and close the dialog.
You can now open the Control Center page via a secure connection. Notice that the URL of your Control Center now starts with https://. This is how you know that you properly set up the secure connection to your Control Center.
Instructions for the EPMWebDAV Site
Open your IIS Manager.
In the Connection panel on the left side of the window, expand the "yourservername" node, and expand the Sites node.
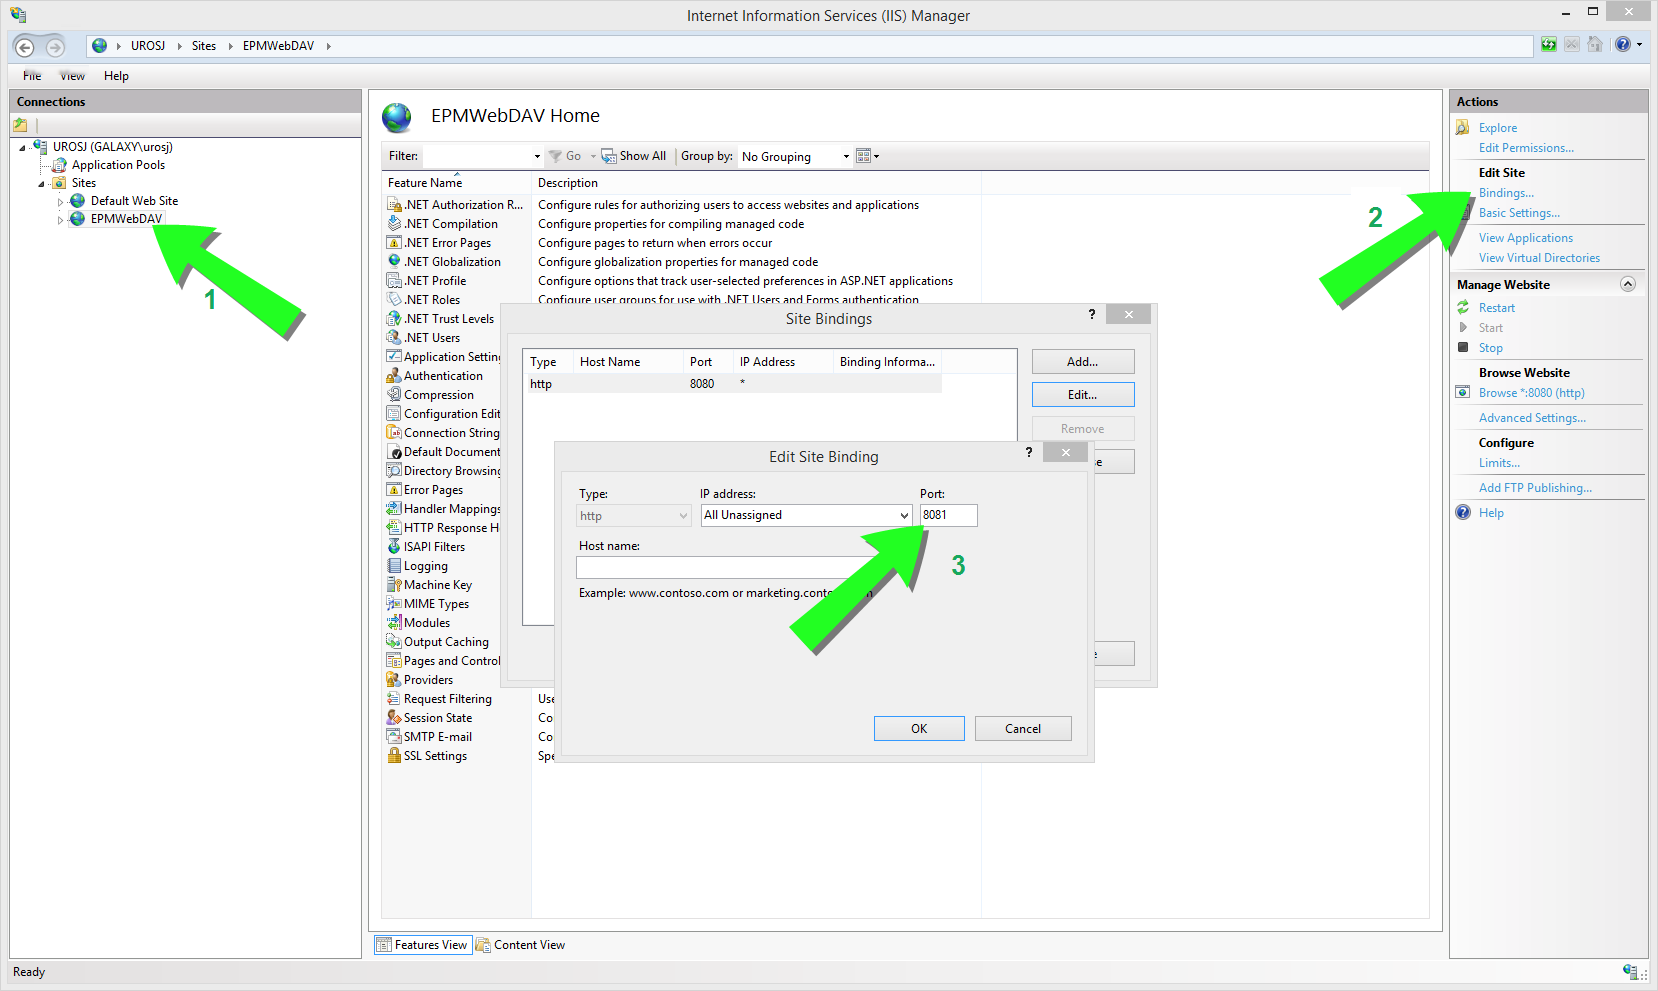
Select EPMWebDAV.
In the Actions panel on the right side of the window, click Bindings.
Site Bindings dialog opens. Select the existing item and click Edit.
In the Port field, enter 8081.
Click OK.
In the Type field, select https.
In the Port field, enter 8080.
You can leave theHost name field empty.
If your system later requires Host name, enter your computer name.
You can find your computer name in Control Panel > System and Security > System. This is your computer name, not an FQDN name.
In SSL certificate, select the right certificate. You can click the View button to see the properties of your certificate.
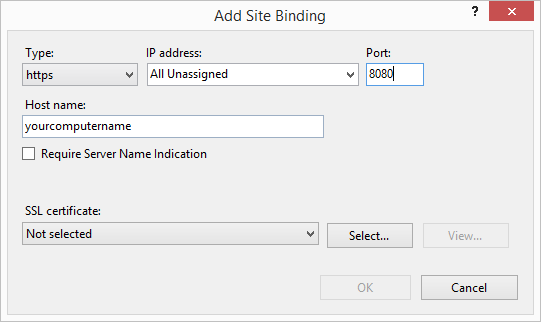
Selecting the certificate
NoteIf you don't see the appropriate certificate on your list, install your certificate first. There are numerous instructions on how to install the certificate available on the Web.
Click OK.
Select your old http binding configured on port 8081. Click Remove.
Click Close.
Modifying the config file
These steps are only necessary if you didn't select the Activate HTTPS (SSL) support for a secure client-server communication option when installing Control Center.
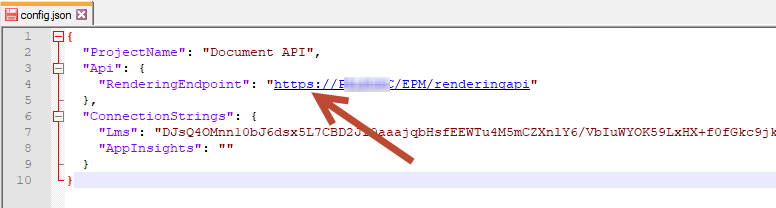
After you change http:// to https:// in ISS, edit your Control Center config file:
Navigate to
c:\Program Files\Loftware\Loftware Control Center\DocumentAPI\.Open the
config.jsonfile with a text editor.Find the "RenderingEndpoint" line and change http to https.
Save and close the
config.jsonfile.
Your communication between your desktop File Explorer and your Control Center is now secure.