Phase 2: Creating your database in a failover cluster
Before you start creating Control Center's database on your failover cluster, meet the following requirements:
To install the Control Center database, you need an administrative account for the SQL Server. You can be logged on as:
A Windows user, set up as the SQL administrator. See the Logins section in the SQL Server Management Studio.
A SQL user account with permissions to create a database, such as the "
sa" user.
Note
By using Advanced installation > DBTool (Database Setup Tool installer) you don't need sysadmin privileges. User that creates Control Center database must be a dbowner or a member of dbowner role.
Make sure your SQL Server cluster is configured correctly. Please refer to the Microsoft user documentation that covers the installation and configuration of SQL Server.
Have your Database Setup Tool installer ready.
Note
You can download DBTool from Loftware Utilities page. Downloaded DBTool is compatible only with the latest Control Center version. For previous DBTool versions contact our support.
Database Setup Tool is a utility tool that enables you to:
Create and manage the database on your SQL Server.
Create and manage the required database users.
Important
When you run your Database Setup Tool, the tool creates an .ini file. You need the .ini file to store your database configuration settings. These settings enable you to install yourControl Center application.
Create your database in the failover cluster from the server on which you are also installing your Control Center. Log on to this server.
Double click
DBToolSFX.exeto extract your Database Setup Tool. Then run theDBToolGui.exefile located in theDBTool folder. Go to Server Information.SQL Server name is the name of the SQL Server instance on which you create your Control Center database. By default, the Database Setup Tool names your instance as
SERVER\SQLSERVER.Database name is the name of the database you are creating. Loftware recommends you to keep the default name NiceAN for potential future communication with the Loftware support team.
Select your Authentication type. You can create your database by logging on as a Windows or as a SQL user.
Important
No matter which authentication type you choose, your user account must have sysadmin privileges on the SQL Server.
If you decide to use Windows authentication, you have two options. In both cases, your account needs Windows domain administrative privileges and SQL sysadmin role.
Select Use currently logged on user if you are currently logged as a Windows user with sufficient privileges.
You can use another Windows account if your current user account has insufficient privileges.
Note
Make sure you use the
DOMAIN\USERsyntax.
If you decide to use SQL Server authentication, provide a user defined in the SQL Server that has a sysadmin role. This is usually the
sauser.
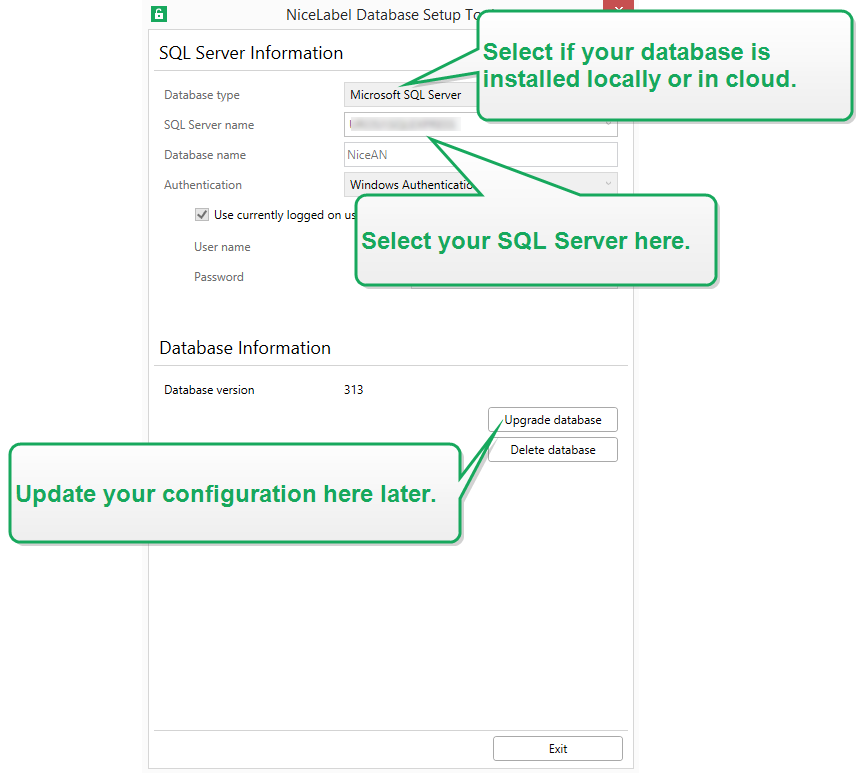
To define the database users, go to Database Information.
Users creation selects how you are going to define the required database users.
To let the Database Setup automatically create the required users for you, accept the default Create EPM_USER and EPM_DBADMIN option.
To give your created users EPM roles, select I have created the users myself.
In both cases, you can use Windows or SQL Server authentication.
Click Create database. A confirmation window appears.
Click Save settings and exit. Your File Explorer opens.
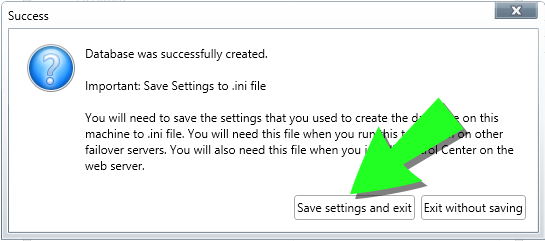
Warning
Keep the .ini file in a secure location. This file contains sensitive configuration settings that could compromise the security of your labeling system.
Store your .ini configuration file on a USB key or at an accessible location on your network.
Certain companies require regular database configuration changes. In most cases, such changes are part of regular security updates. To change the database configuration:
Click Update installation configuration.
A new window opens. Choose what to upgrade.