Comparing label files

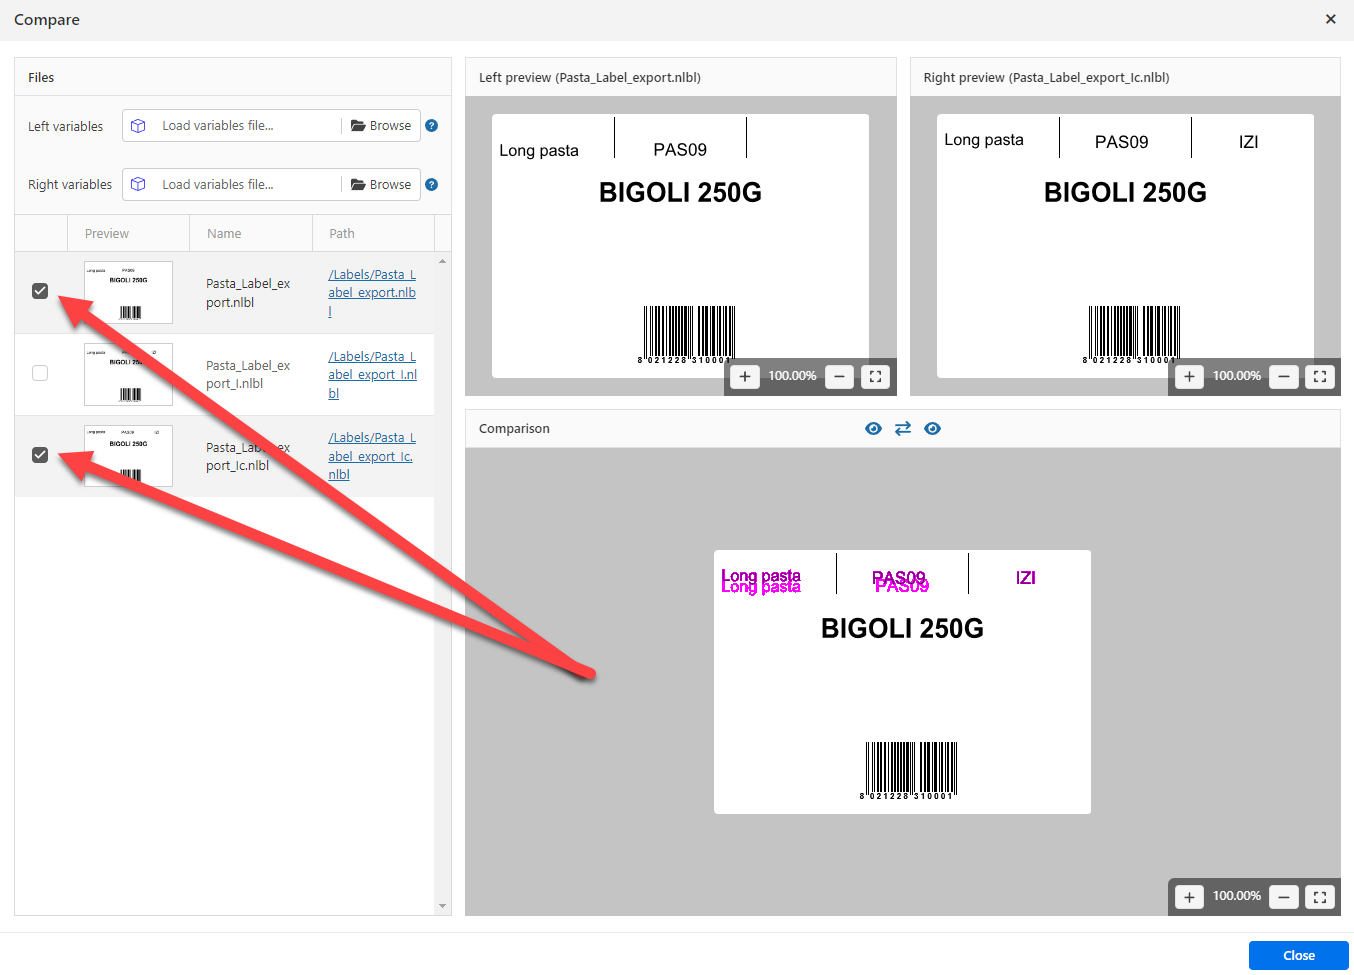
The color coding allows you to spot all differences.
Note
Graphic comparison is available for the label (.NLBL) files and graphics.
Comparing Different Label Files
To compare different label files, do the following:
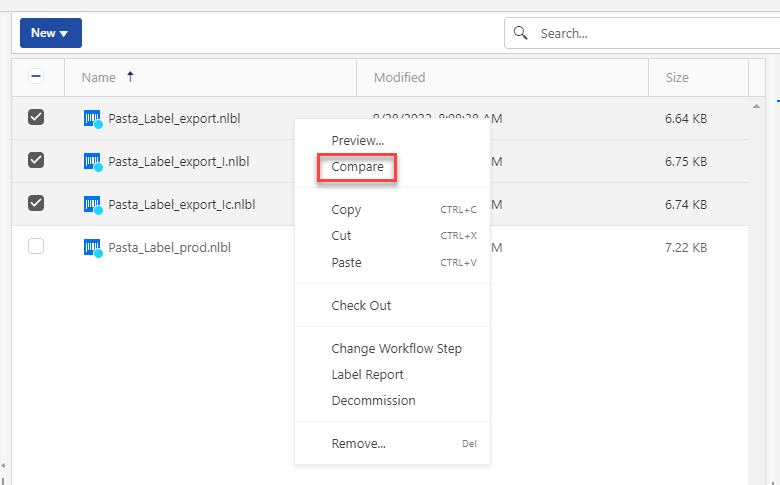
Open Documents in Control Center and navigate to the folder with labels you want to compare.
Select two or more labels in the same folder.
Right-click in the file selection pane and select
Compare .
Select two label files for comparison. The superimposed image of label differences shows the previews of the two selected labels. Changes in label designs display in color.

By default, dark magenta belongs to the left preview and bright magenta belongs to the right preview. To switch both magenta colors, press the middle icon with two arrows.

To disable/enable left or right preview in the
Comparison window, click the eye icons.
Comparing Revisions of the Same Label File
To compare revisions of the same label file:
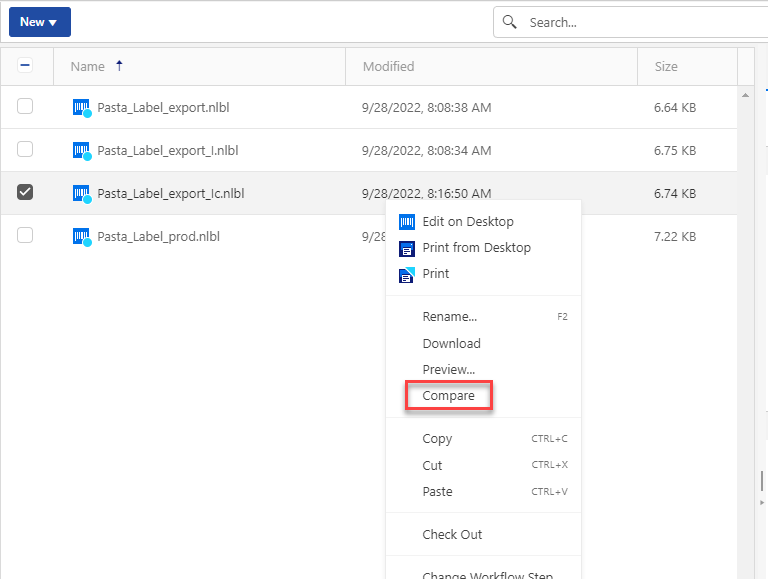
Right-click the label that has at least two revisions and select
Compare .
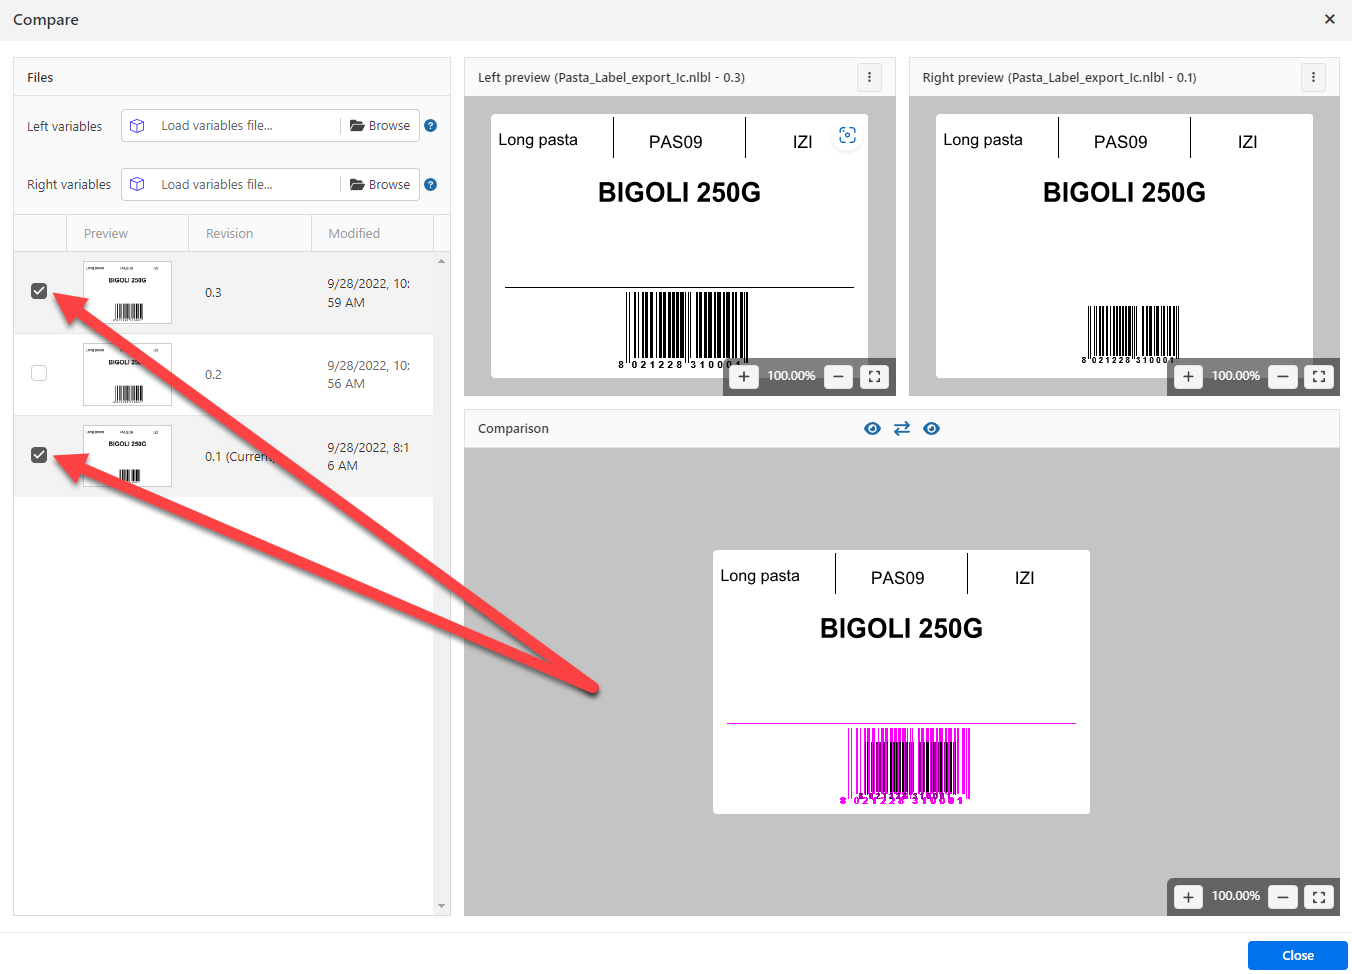
Select two revisions for comparison. The superimposed image of label differences shows below the preview of the two selected labels. Changes in label designs display in color.

Applying Values From Data Files to Variables
You usually design your label templates with variables that don't have any default value defined. This ensures that no hard-coded values would be used during printing. On the other hand, it makes the label preview and comparison more difficult because you have to provide the values for variables before Control Center generates the label preview. When generating the label preview, you can enter values manually.
You can also provide Control Center with the external data file (a list of variables and their values). Control Center applies the data file for the generating label previews. The data file must provide the
Note
You can let Control Center find the data file based on the rules defined below, or you can click the folder icon next to the label name/preview and override the defaults with your data file.
You can create your variable data file in XML or delimited structure.
You provide your variables within <Variables /> root element in your XML file. Provided variable names with attribute names and variable values with the element value.
<?xml version="1.0" encoding="utf-8"?>
    <Variables>
    <variable name="customer">Pizzeria Manhattan</variable>
    <variable name="country">Belgium</variable>
    <variable name="Lot_nr">478887566</variable>
</Variables>Create every
customer=Pizzeria Manhattan
country=Belgium
Lot_nr=478887566
The name of the data file can be the same as the name of the label, but using the extension .values. This private data file allows you to provide different data file for each label.
If you have a label named label.nlbl, name your data file label.values.
The other option is to use the same generic data file for all labels. In this case, name the data file default.values. The
Note
If both files exist in the same folder, the file label.values will take precedence over the file default.values.
You can store your data file in any location in the Documents storage.
Example
You stored your label pasta.nlbl in the folder /food labels. The path to your label is /food labels/pasta.nlbl.
Control Center searches for your data file in the following order.
The private data file in same folder as the label file.
Example
/food labels/pasta.valuesThe private data file in the subfolder SampleValues.
Example
/food labelsfolder1/SampleValues/pasta.valuesThe generic data file in the same folder as the label file.
Example
/food labels/default.valuesThe generic data file in the subfolder SampleValues.
Example
/food labels/SampleValues/default.values
When Control Center finds first available .values file, the search stops and the contents of the data file is used for the label preview.
Note
Using the SampleValues subfolder is useful when you have a workflow process defined in the label folder, but you do not want the same workflow to govern your data files. In this case, you can store the new version of the data file without going through all workflow steps.