
Create and update custom printing preferences for multiple printers in your system at once, from one place.
A driver profile is a set of printing preferences linked to a specific printer driver. Putting printing preferences in profiles allows many printers to share the same set of printing preferences without the need for duplication.
Assign driver Profiles to your printers to apply the same printing preferences on multiple printers of the same model without manual configuration. Profiles are sets of printing preferences for specific printer models in Control Center. Centrally-managed Profiles save you time setting up, accessing, and updating printing preferences for individual printers of the same model in your system.
![[Note]](../Resources/Images/note.png)
|
Note |
|---|---|
|
You can add centrally-managed printers of any manufacturer or model to your profiles, but we recommend only using printer model-specific profiles. You can also use manufacturer-specific printer profiles to manage generic settings like speed and darkness. |
Open Control Center > Printers > Profiles to see your detailed list of profiles.
Working with Profiles
To add new profiles:

|
-
Go to Printers > Profiles.
-
Click Add (on your top left). The Add New Driver Profile page opens.
-
Choose a new Profile name and Description.
-
Choose your Printer manufacturer from the drop-down menu.
Note If you don't see your printer manufacturer, add the correct printer Driver Packages for your printer to Control Center.
-
Choose your Printer model from the drop-down menu.
-
Choose your Driver package from the drop-down menu. Printing Preferences appear for your selected printer.
-
Choose shared Printing preferences for all printers assigned to your profile. Available printing preferences depend on your printer model and manufacturer. For more information, read Managing Printing Preferences.
-
Click Save. Your new profile appears on your list on Printers > Profiles.
To update profiles:
-
Go to Printers > Profiles.
-
Click an existing profile name. The profile page opens.
-
Update your existing Profile Information and Printing preferences.
-
Click Save. Your updated profile appears on your list on Printers > Profiles.
To delete profiles:
-
Go to Printers > Profiles.
-
Select existing profiles and click Delete. The Delete Driver Profiles window opens.
-
Click Delete. Your profile no longer appears on your list on Printers > Groups.
Adding or changing profiles to printers
|
-
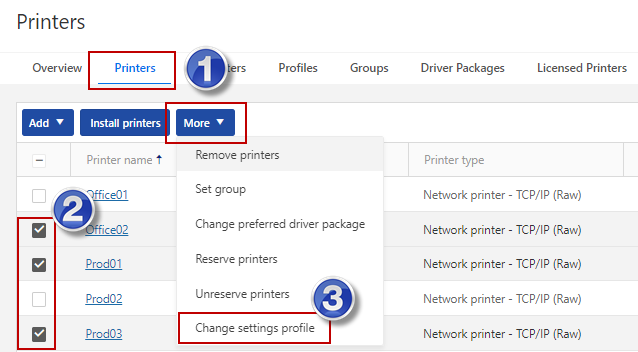
Go to Control Center > Printers > Printers.
-
Select printers you want to add or change profiles.
-
Click More > Change settings profile.
-
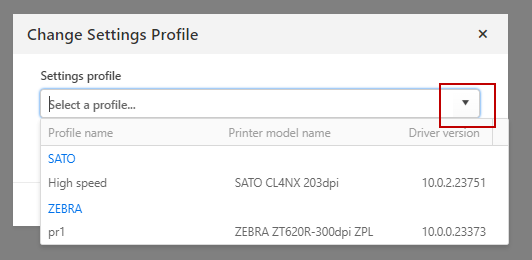
Select your printer profile.
-
Click Save.
Creating profiles for specific models of your centrally-managed printers helps you save time configuring and update multiple printers at once.
Removing profiles from printers
|
|
-
Go to Control Center > Printers > Printers.
-
Select printers you want to remove profiles.
-
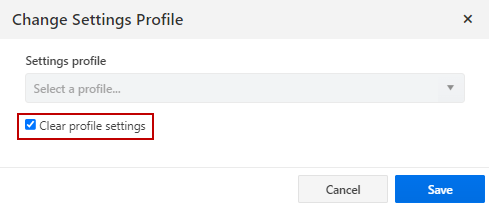
Click More > Change settings profile.
-
Click Clear profile settings.
-
Click Save.