Editing existing labels in Web Designer
You can edit your existing labels in Web Designer:
Go to your Control Center >
Documents .Navigate to the label you want to edit.
Right-click the label, then click
Edit from the drop-down menu.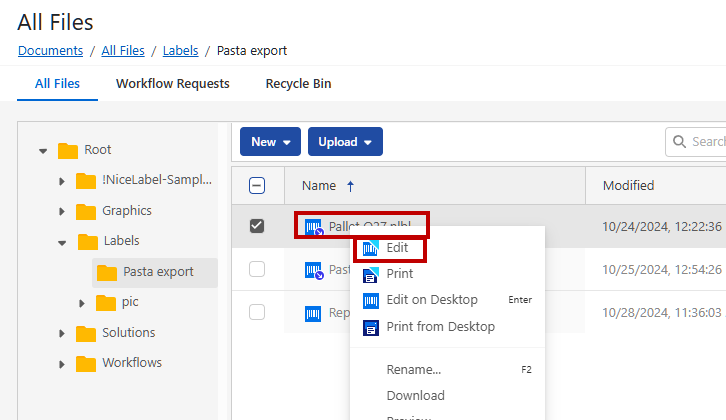
Note
If you use Cloud Essentials, Cloud Business or Cloud Enterprise product editions, your labels may be locked for editing because of limited user rights or using versioning. For exceptions, see the Troubleshooting.
Important
In Cloud Designer, two or more users can edit the same label at the same time. To prevent simultaneous editing, upgrade your product to a higher edition, and contact Loftware sales.
Note
You might use an alternative version of Cloud Designer with a slightly different user interface.
This version prevents two or more users to edit the same label at the same time. When you want to edit the label, right click the label file and select Check Out.
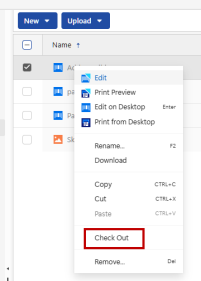
When you check out your label:
The file becomes locked exclusively to you.
Other users can still view the file, but they cannot edit it.
If another user tries to edit it, they receive a warning message that the file is reserved.
You can safely work on the label without the risk of parallel edits.
A lock icon indicates that the file is currently checked out.
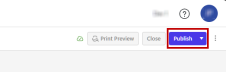
When you finish editing the label, save your work and check in the file by clicking the Publish button.
This releases the lock and makes the file available for other users to edit.
Important
When you select Discard Check Out, all changes are discarded since the last Publish action. This can cause the loss of the latest editing from another user.

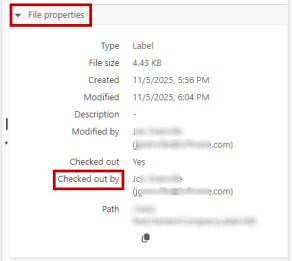
You can see the user who has the label checked out in the Documents section. Click the label file and review the File Properties on the right side of your screen.